How to List a Token on Uniswap in 2026
 May 28, 2025
 Updated: June 25 2026, 09:58

LEAVE A REQUEST
Launching your own token project? Our experts are ready to help with listing on exchanges, market making, marketing and other solutions
SUBMIT APPLICATIONUniswap does not use a conventional token listing application or exchange approval process. To make a compatible token tradable, the project creates or joins a liquidity pool, defines the initial market structure, and deposits liquidity.
The technical transaction can be completed quickly once the token, wallet, pair, pricing approach, and liquidity are ready. However, creating a pool is only one part of the launch. The team must also verify the market, publish the correct contract and pool information, manage liquidity, and coordinate launch and post-launch activity.
This guide explains the practical process in 2026, from preparing the token and choosing a Uniswap pool structure to adding liquidity and monitoring the market after launch.
What “Listing a Token on Uniswap” Actually Means
On a centralized exchange, listing normally involves an application, exchange review, agreed terms, and a coordinated trading launch.
On Uniswap, “listing” generally means creating or funding an onchain liquidity pool that allows users to trade the token. There is no conventional exchange-side approval, but the project remains responsible for the contract, initial price, liquidity structure, official links, market operations, and user communication.
Pool creation also does not guarantee that complete pricing, charts, token information, or external tracker coverage will appear immediately.
What You Need Before Creating a Uniswap Pool
Compatible token contract
A token contract compatible with the selected network and Uniswap protocol version.
Exact contract address
The official token contract address, ideally with published and verified source code on the relevant block explorer.
Compatible wallet
A self-custody wallet connected to the selected network and controlled by the authorized project team. MetaMask or another compatible wallet.
Network token for transaction costs
Enough of the network’s native asset to cover token approvals, pool creation, and liquidity transactions.
Assets for the liquidity position
The project token and the second asset required by the selected pair and price range.
Launch plan
A defined pair, initial pricing approach, liquidity allocation, position owner, and post-launch management plan.
Official project information
The official website, contract address, pool link, token information, and communication channels that users can independently verify.
For a complete technical, liquidity, security, and operational checklist, review our Uniswap listing requirements.
Step-by-Step Guide: How to List a Token on Uniswap
Step 1: Choose the Network and Protocol Version
Start by selecting the blockchain network on which the token is deployed. Confirm that the intended Uniswap protocol version and liquidity functions are available on that network.
Uniswap v2 uses full-range liquidity. Uniswap v3 and v4 allow the project to select a custom price range or use a full-range position. The appropriate version depends on the token, available liquidity, required flexibility, and the team’s ability to manage the position after launch.
Do not select a version only because it is newer. The pool structure should match the project’s market and operational strategy.
Step 2: Define the Pair and Initial Market Structure
Choose the second asset in the trading pair and determine the intended initial price before creating the position.
The pair may use a network asset, stablecoin, or another suitable token. The choice should depend on where the project’s main liquidity is located, how users are expected to access the token, and how the Uniswap pool will interact with existing or planned CEX markets.
Before proceeding, confirm:
- who will control and manage the liquidity position.
- the initial token price;
- the liquidity allocation;
- the expected trade sizes;
- the acceptable price impact;
For a breakdown of liquidity allocation, pool setup, market making, launch marketing, and post-launch expenses, review our Uniswap listing cost guide.
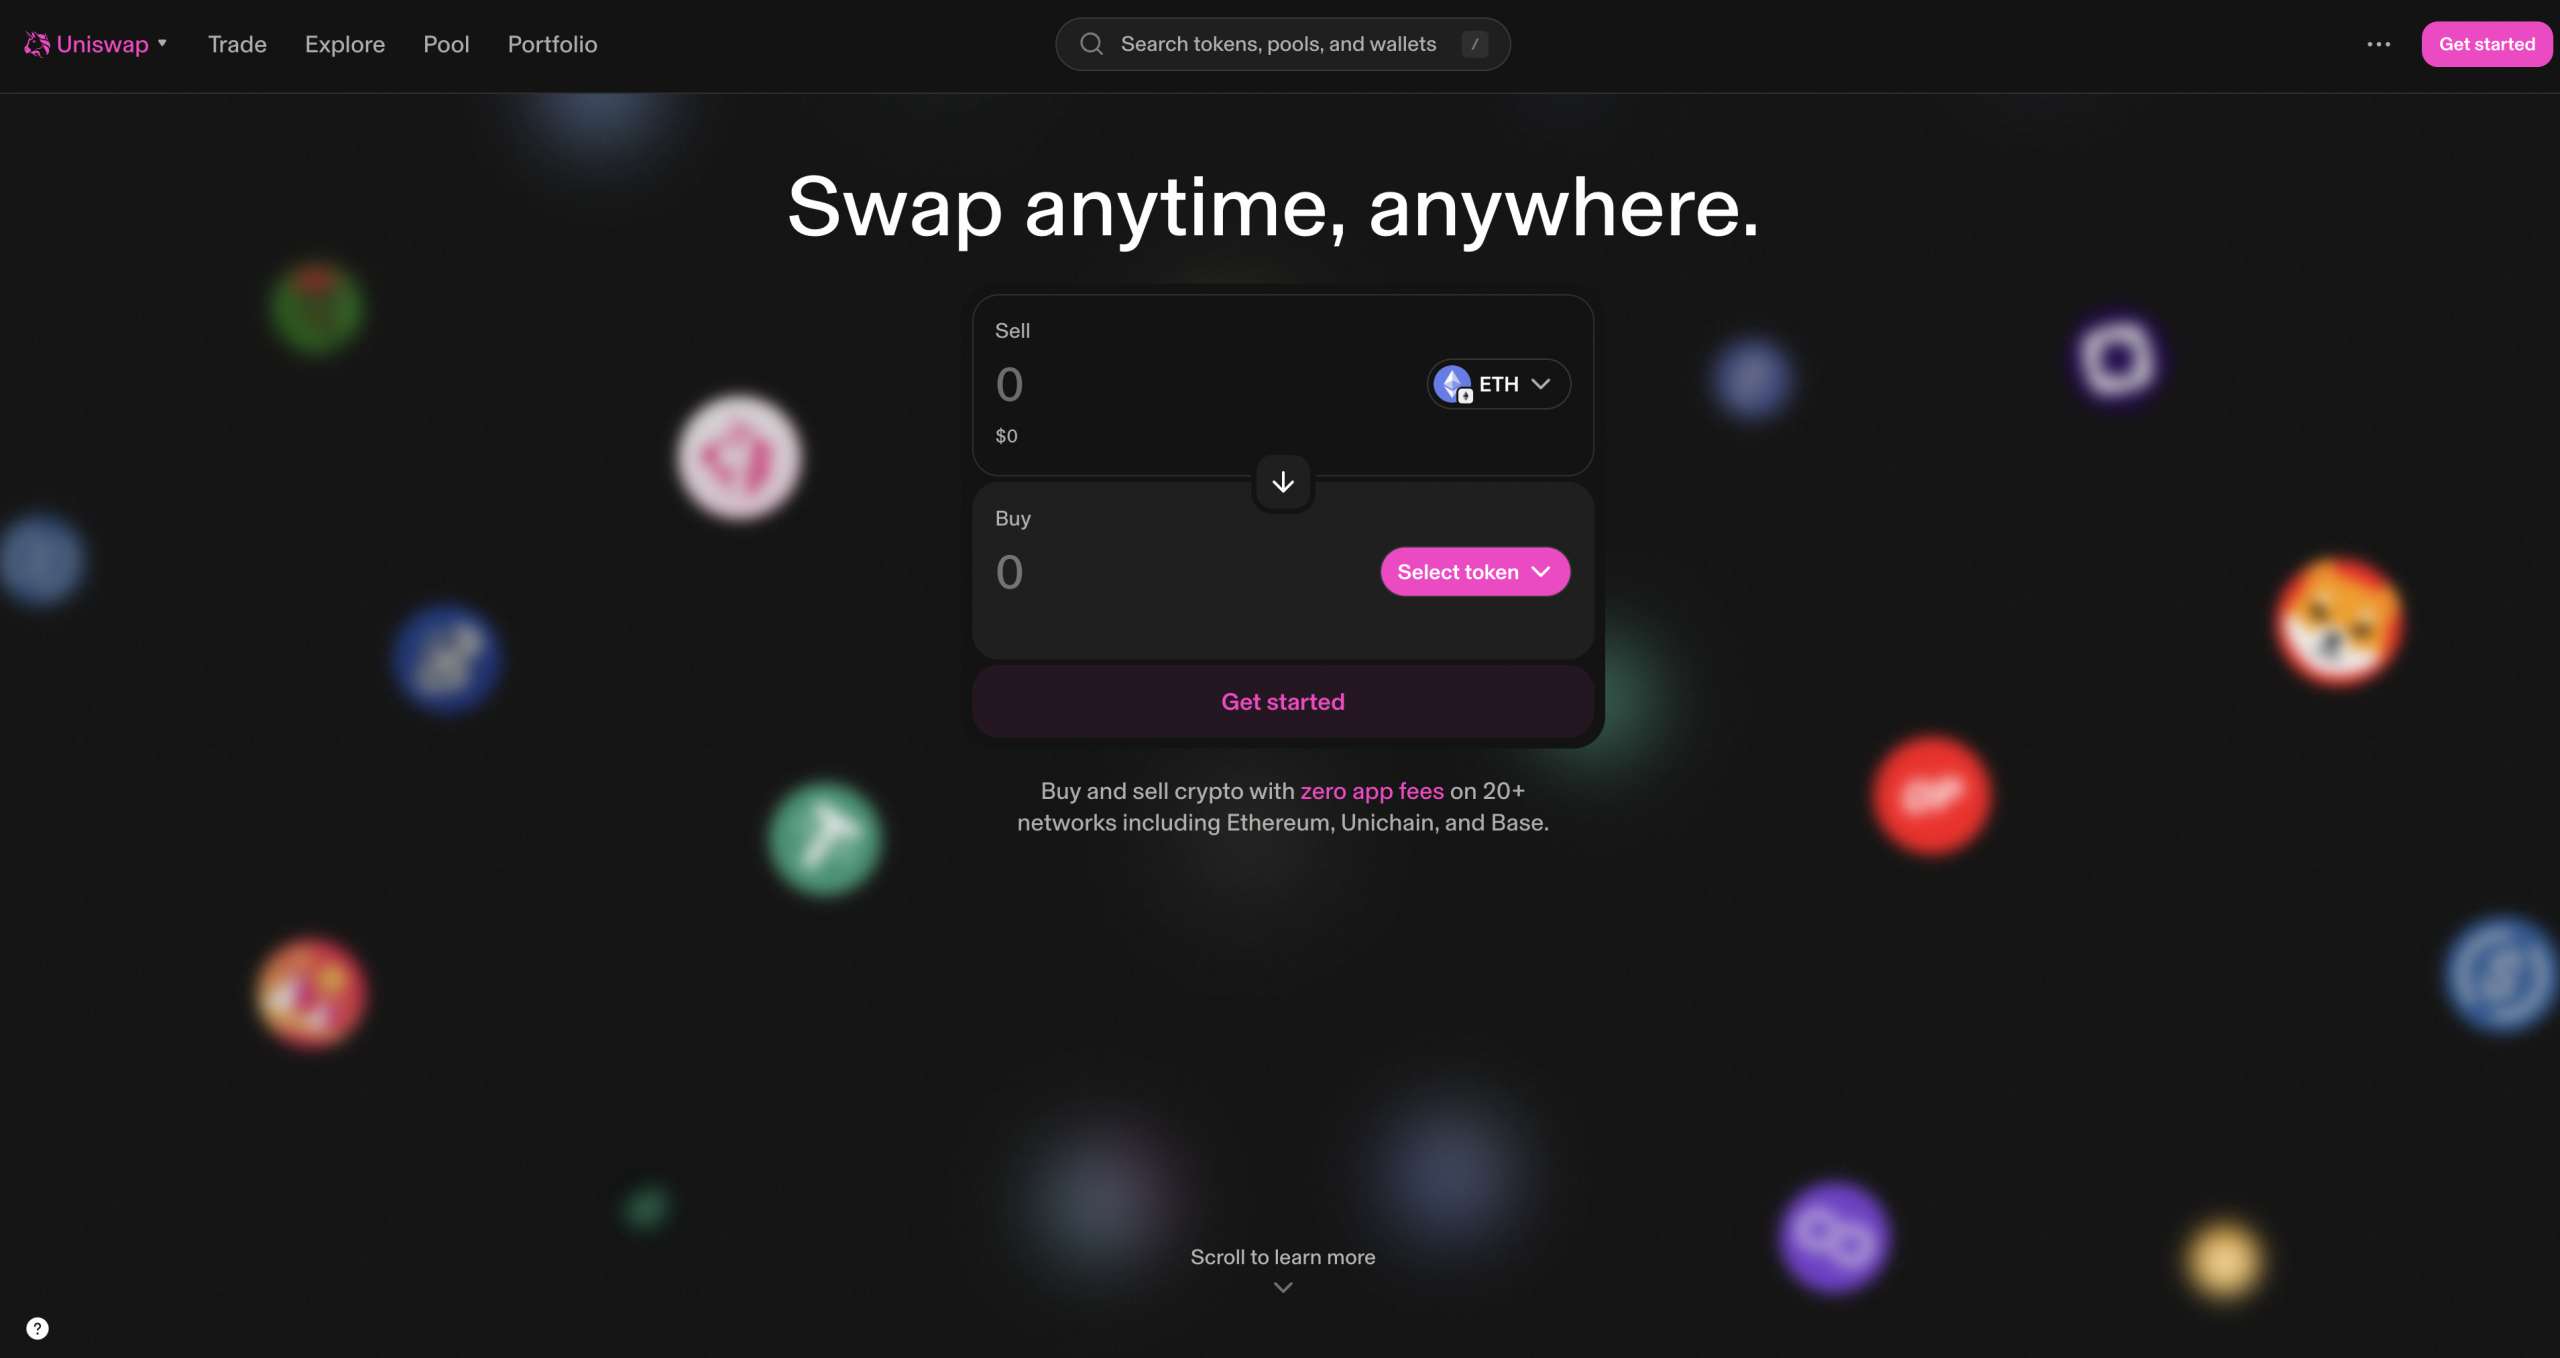
Step 3: Connect the Wallet and Select the Network
Open the official Uniswap web page and connect the authorized wallet.
Switch to the network where the token contract is deployed. Confirm the network, wallet address, token balance, pair asset balance, and native asset available for transaction costs before signing anything.
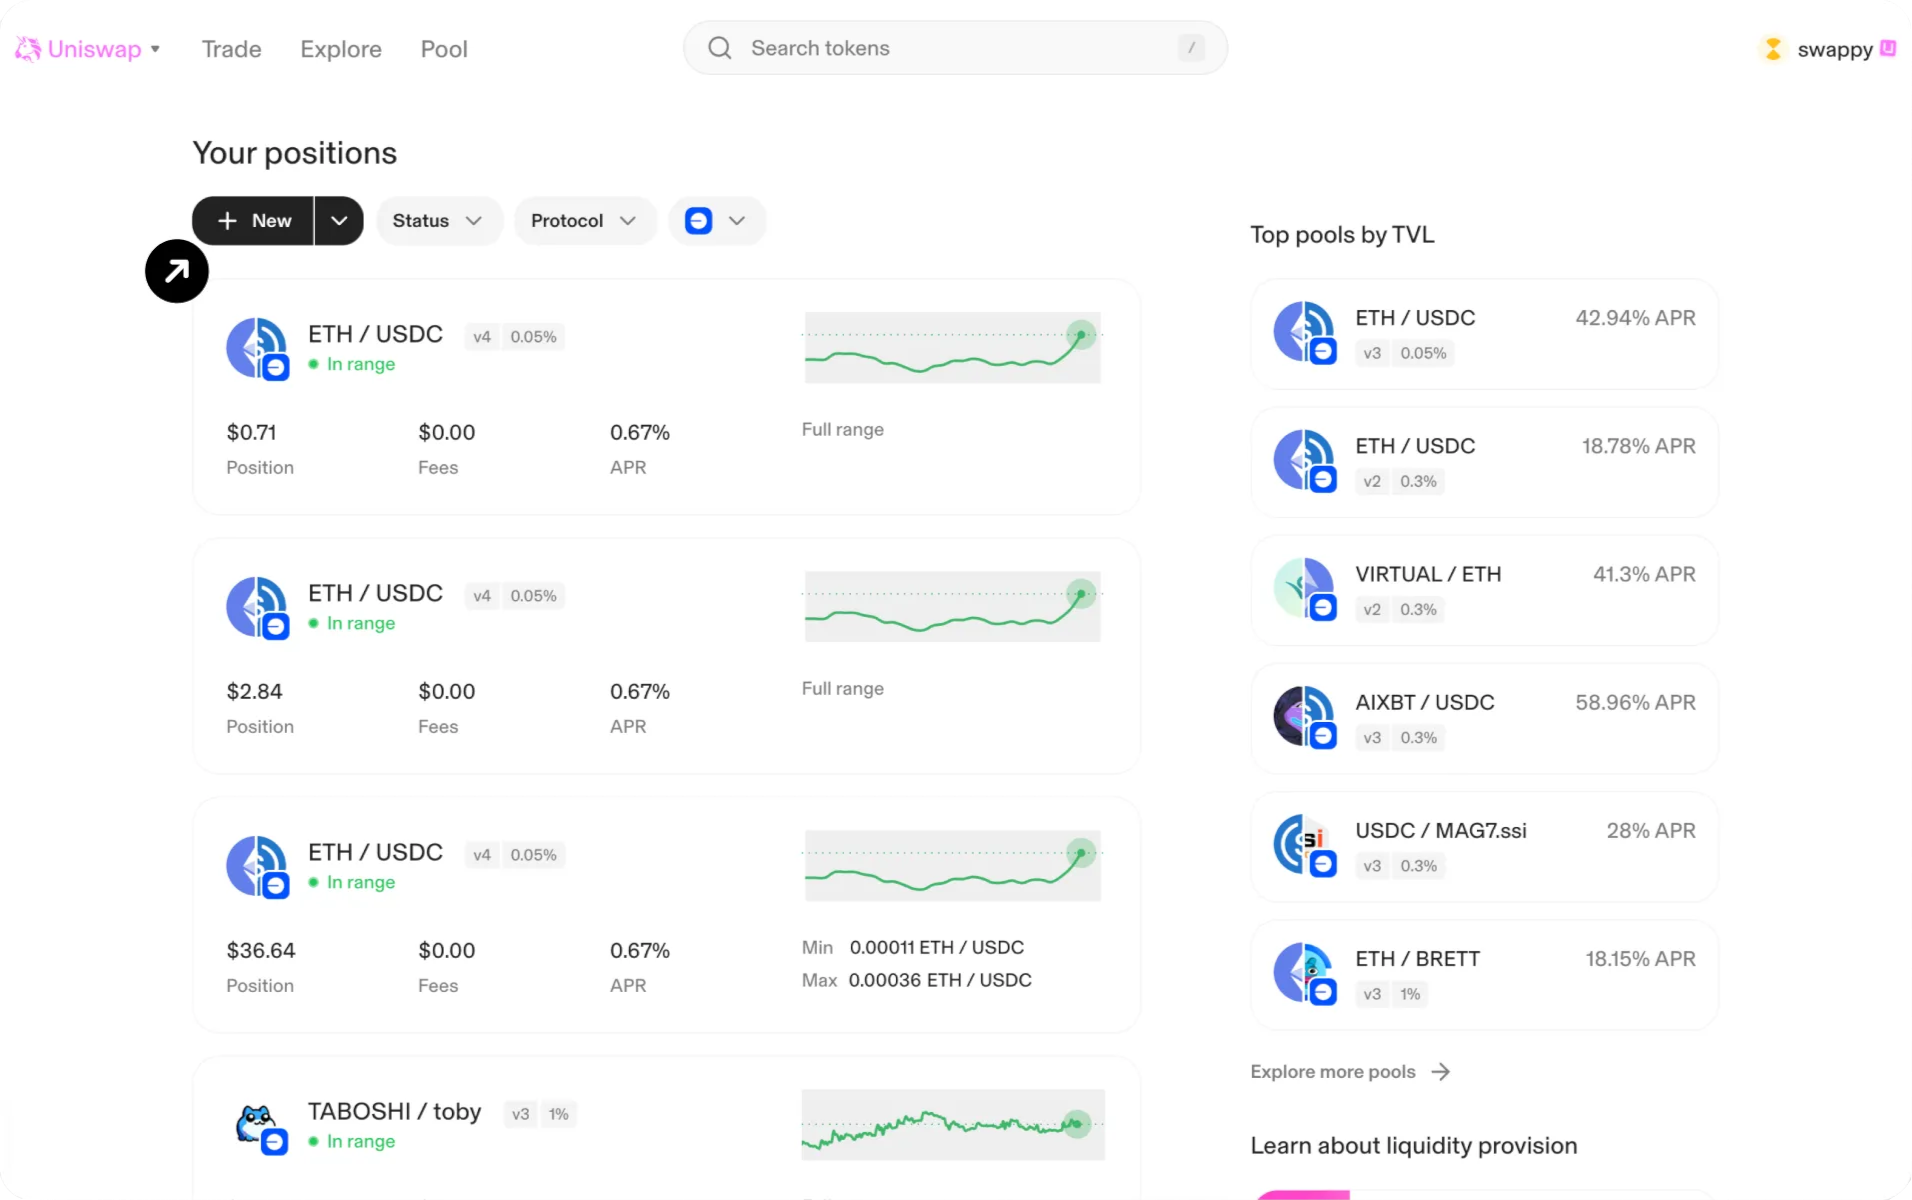
Step 4: Open a New Liquidity Position
Open the Pool section and select New.
The interface will guide you through token selection and the available pool options for the chosen network. Existing pools may appear when the same pair and configuration already exist. Otherwise, the transaction can create a new pool.
Step 5: Select the Token Pair
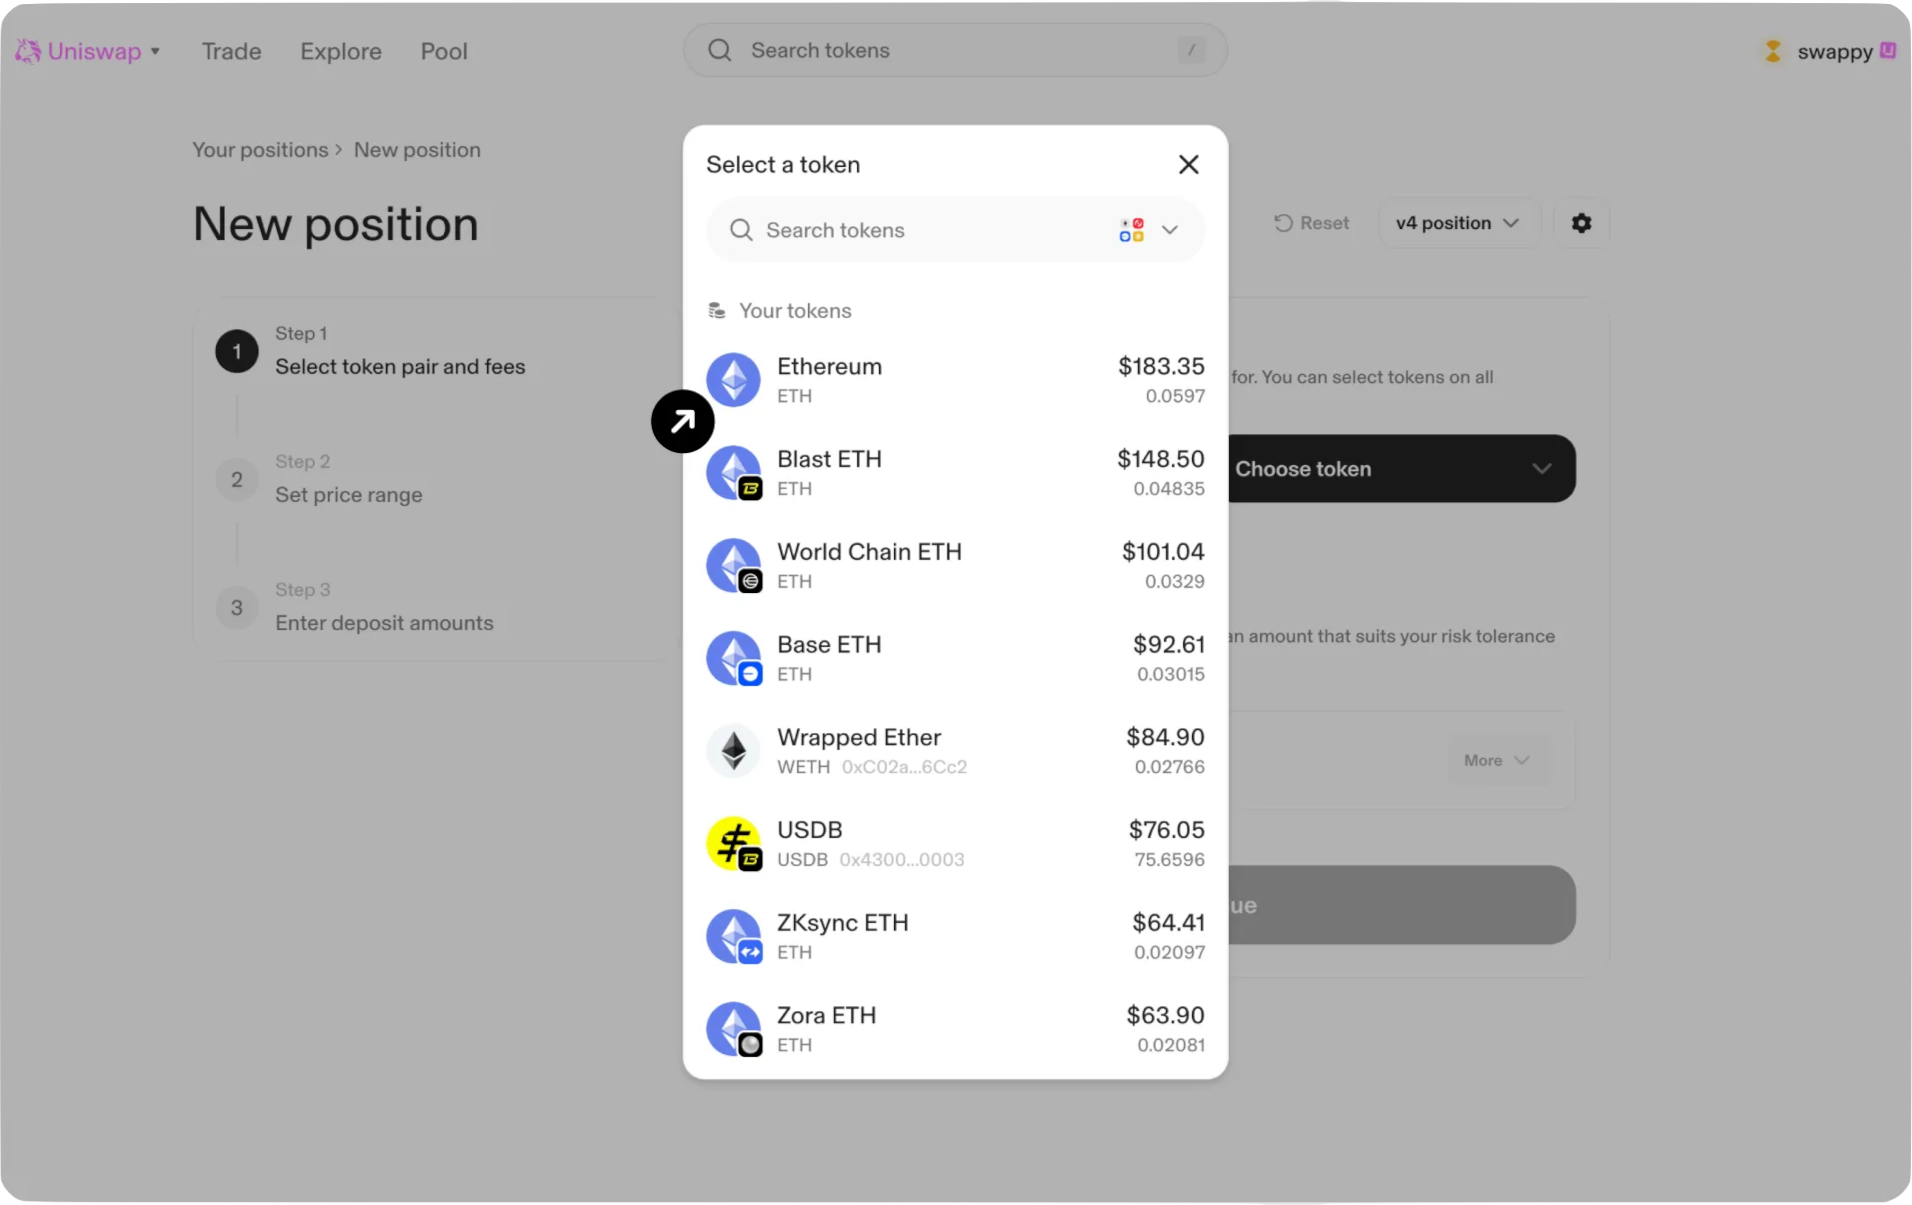
Select the first and second assets.
When the project token does not appear by name or symbol, search using its exact contract address. Use “contract address,” not “Mint address.”
Before continuing, verify:
- the selected network;
- both contract addresses;
- token symbols and decimals;
- whether an existing pool already has meaningful liquidity;
- whether the selected pair is the official market the project intends to promote.
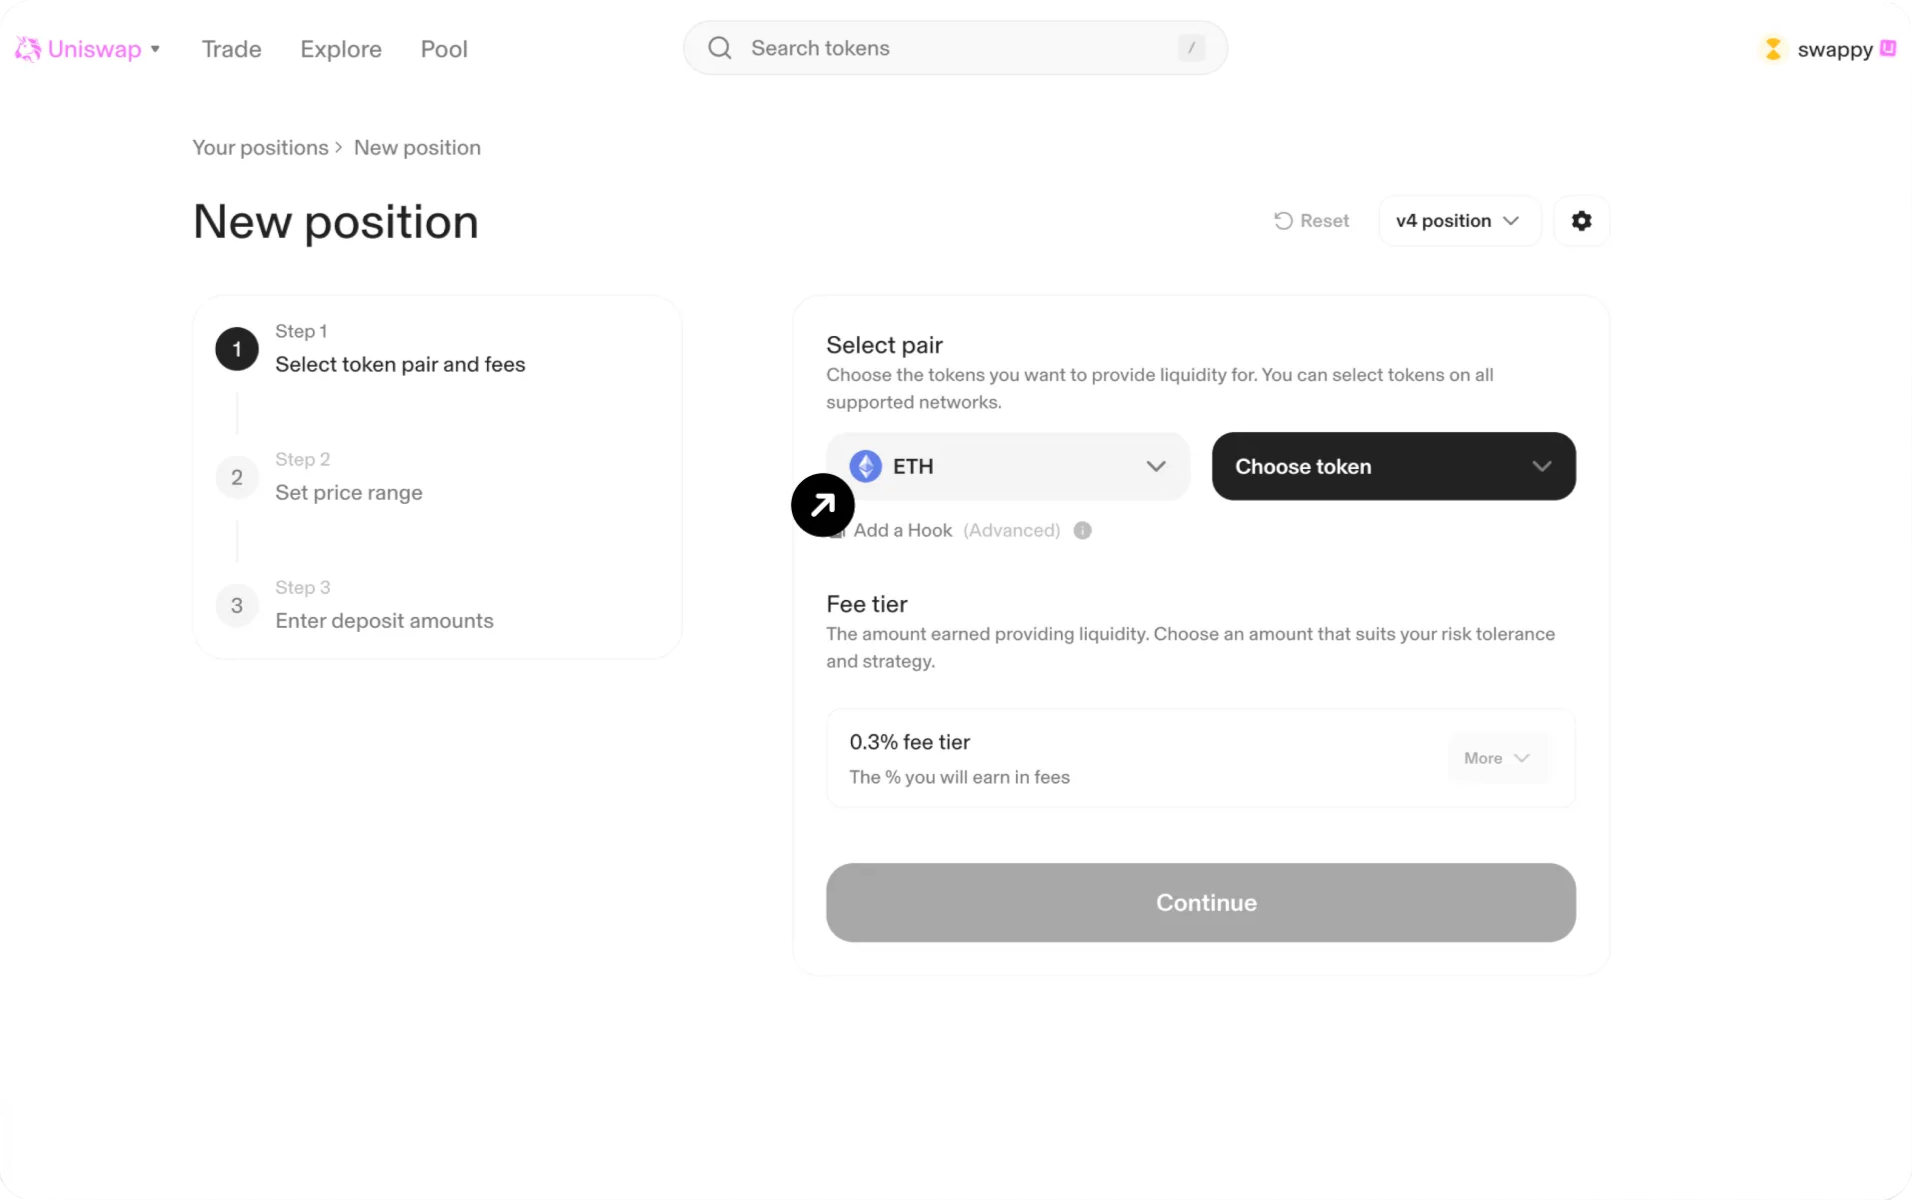
Step 6: Configure the Pool
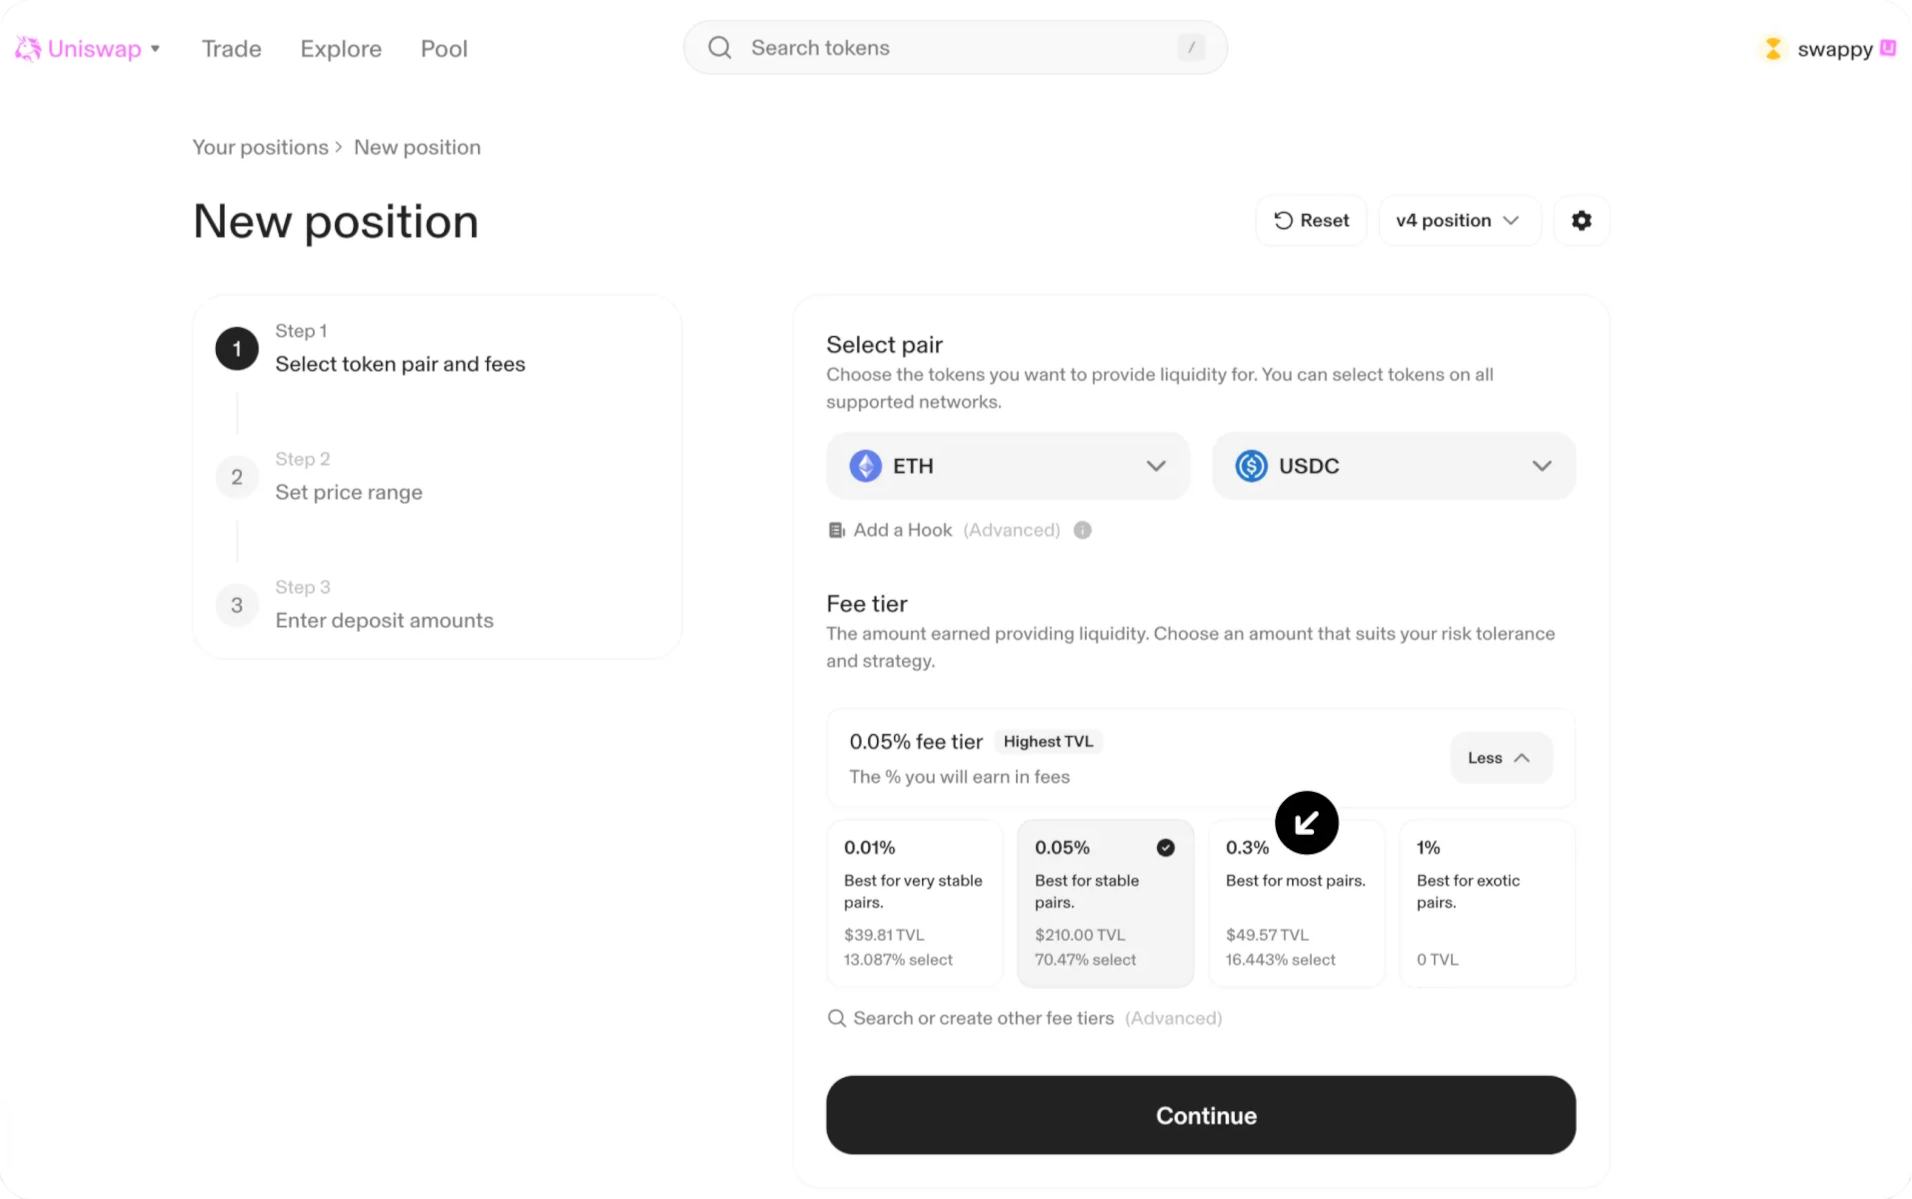
Select the protocol version and the pool fee configuration available in the interface.
There is no universal fee setting that is suitable for every new token. The decision should reflect volatility, expected trading activity, available liquidity, competing pools, and the project’s market-making approach.
For v3 and v4, the interface may also require a price-range decision. For v2, liquidity is provided across the full price range.
Step 7: Set the Price Range and Liquidity Amount
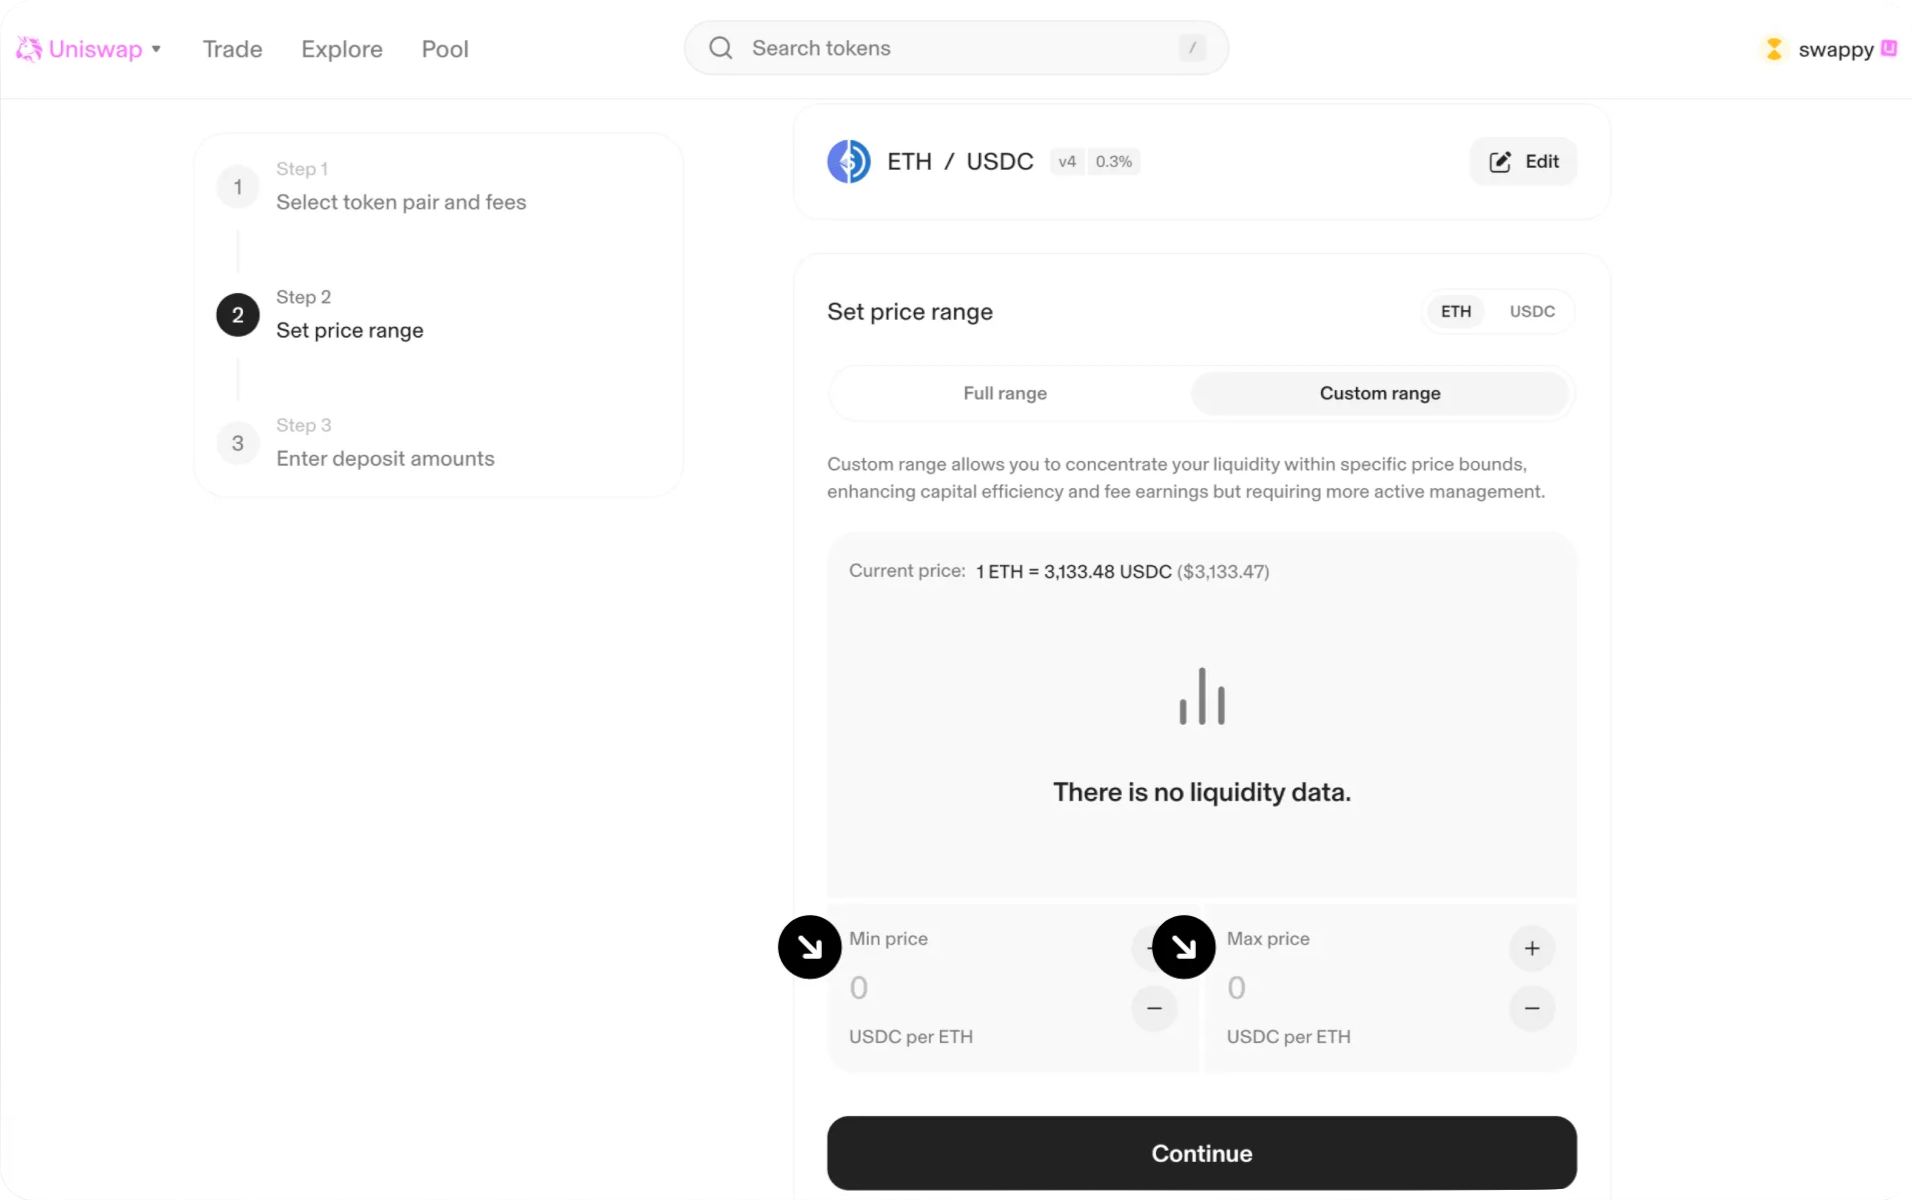
For v3 or v4, choose either a custom range or a full-range position.
A narrower range concentrates liquidity but requires closer management. If the market price moves outside a custom range, the position can become single-sided and stop earning liquidity-provider fees until the price returns to the range.
Enter the amount of liquidity to provide and carefully review the implied price and asset allocation. Do not rely on a universal 50/50 recommendation: the required asset composition depends on the protocol version, current price, and selected range.
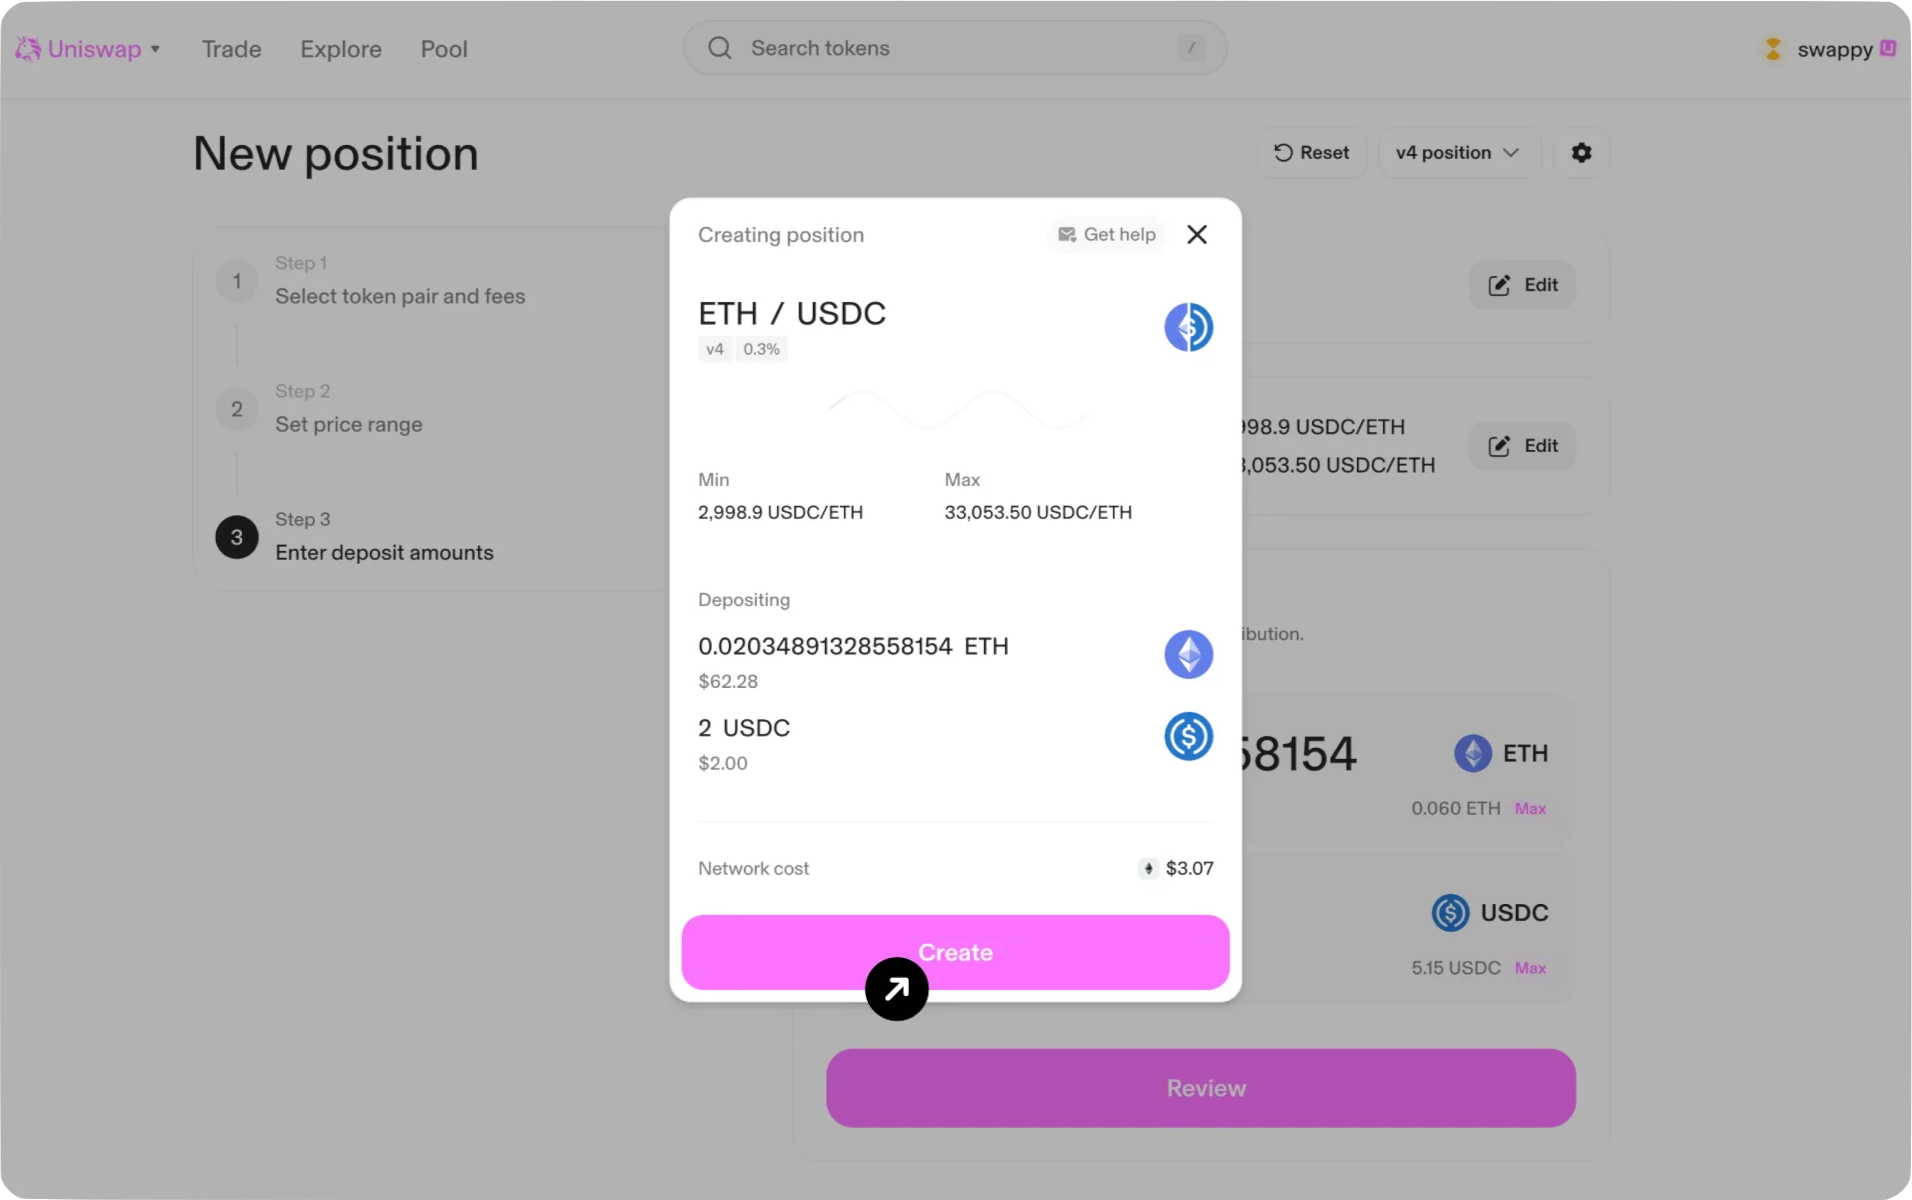
Step 8: Review and Confirm the Transactions
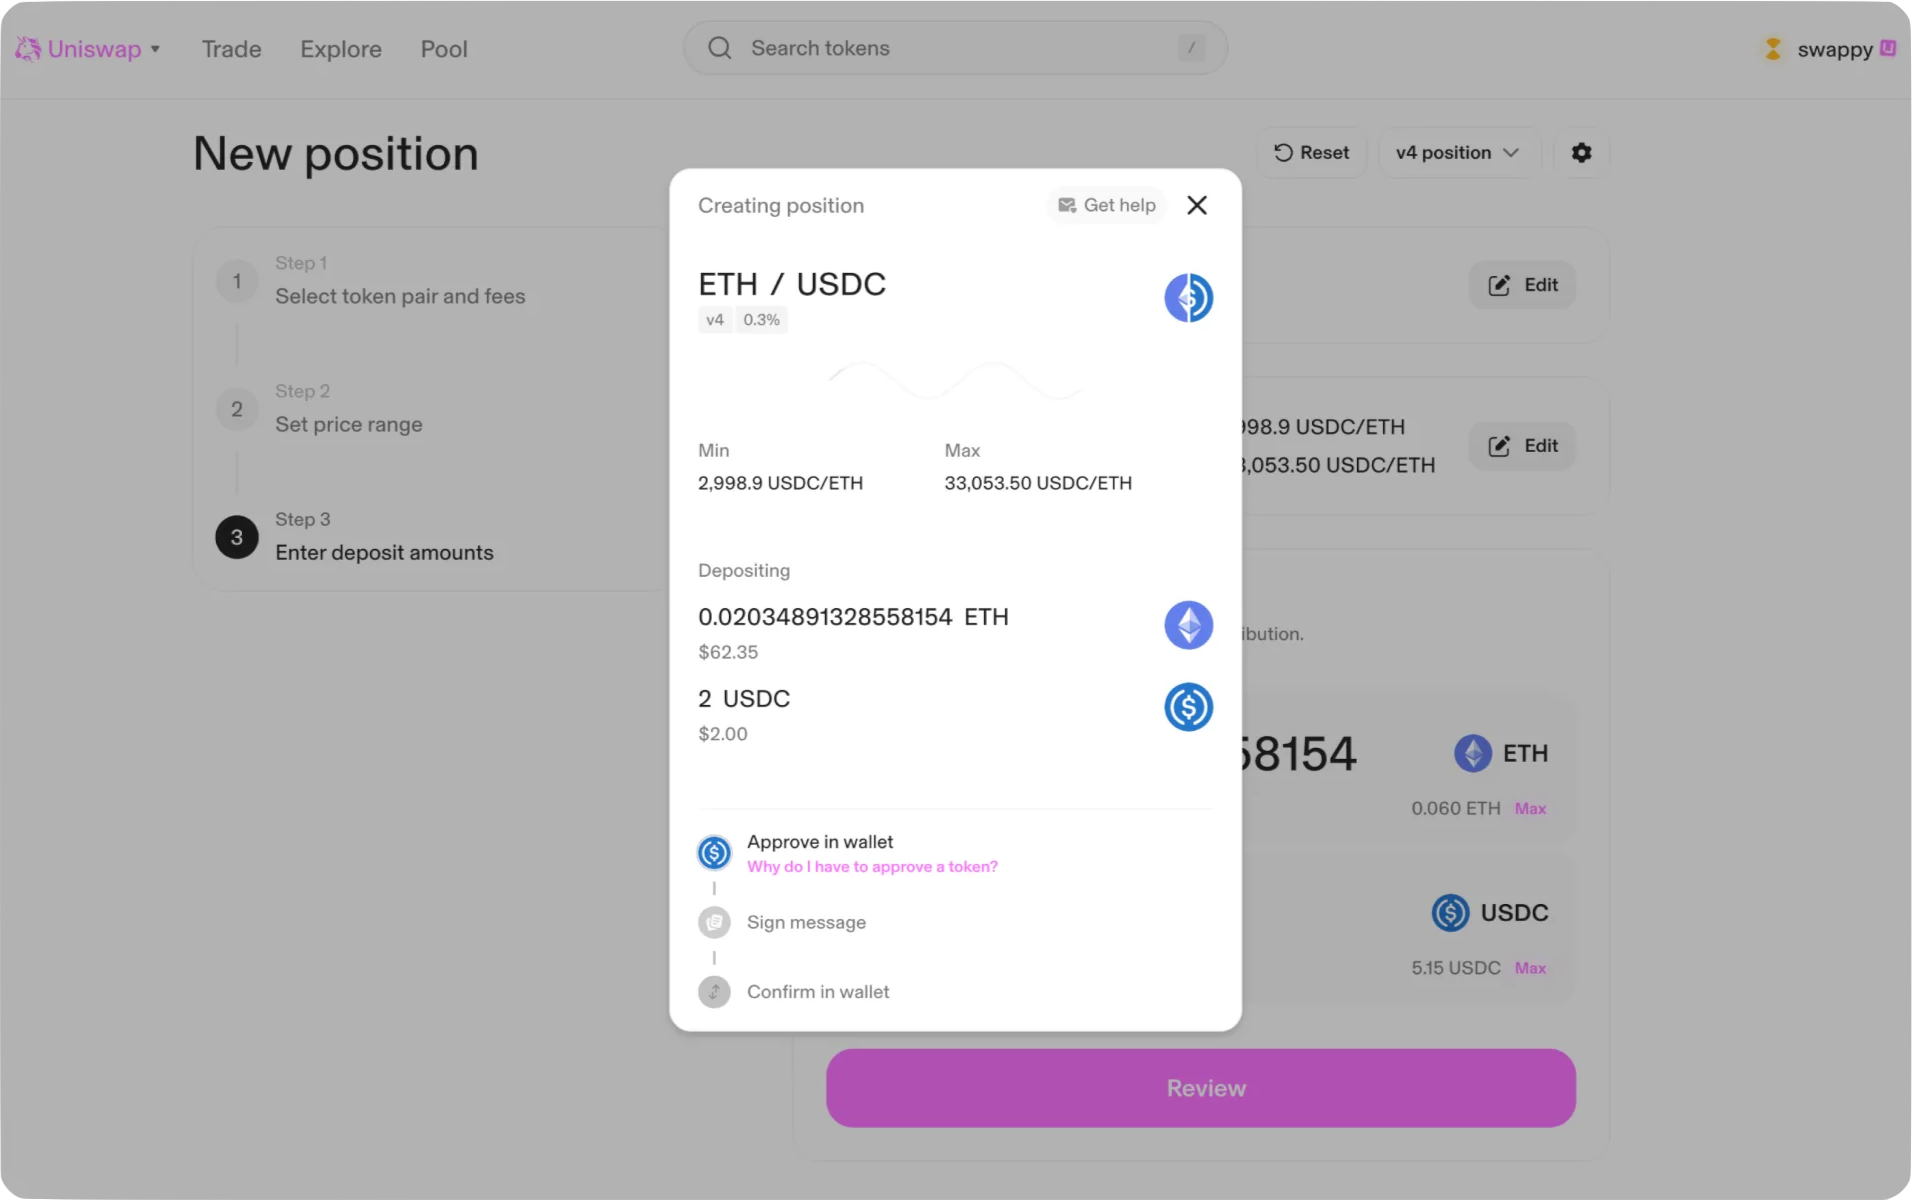
Review the pair, network, protocol version, fee configuration, price range, token amounts, and expected transaction costs.
Depending on the token and protocol version, the wallet may request:
- token approval;
- a signature or permit;
- confirmation of the liquidity-position transaction.
Confirm that every request comes from the official interface and that the wallet is connected to the intended network.
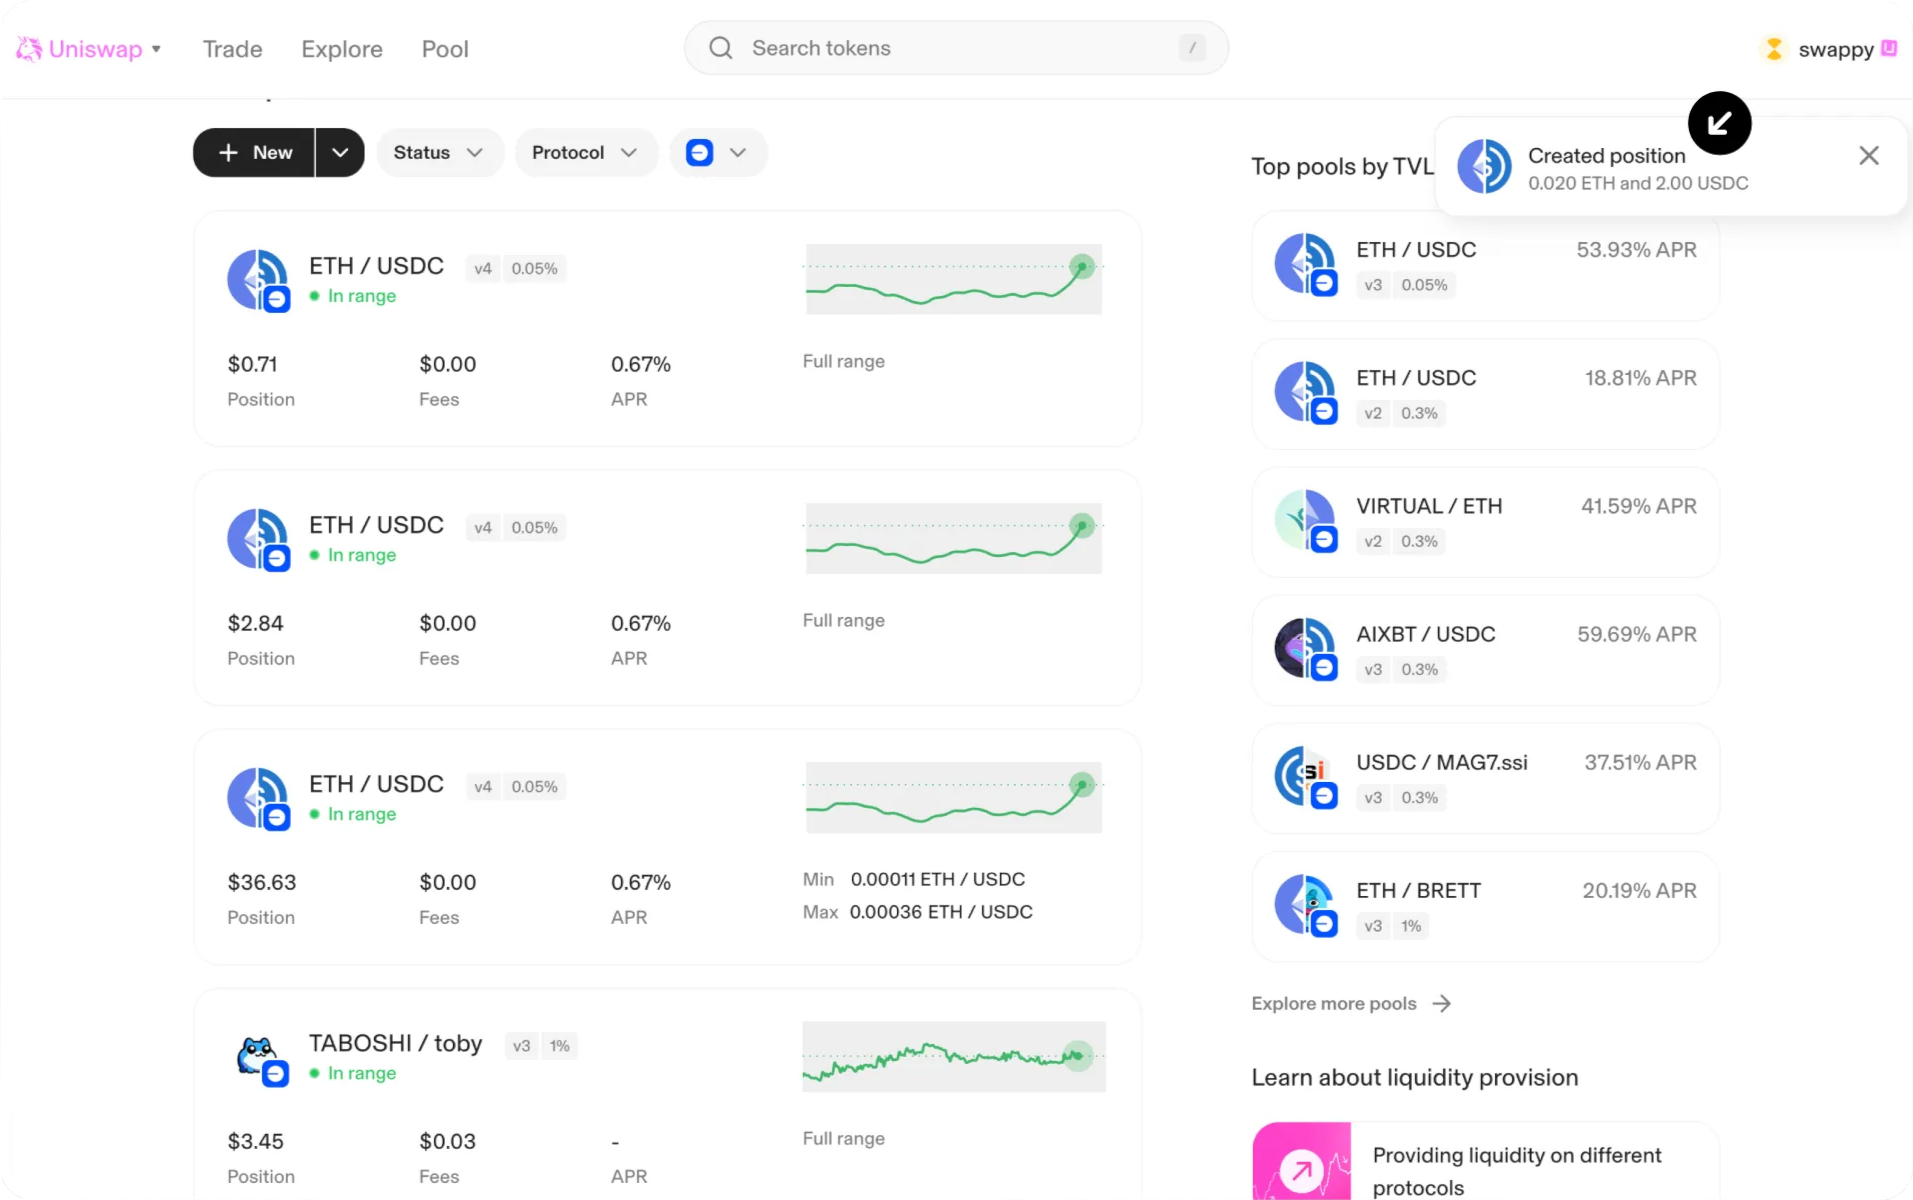
Once the onchain transaction is confirmed, the liquidity position should appear in the Pool or Liquidity Positions section.
Step 9: Verify the Pool and Official Market Links
After creating the liquidity pool, go to Explorer and paste your token’s Mint address in the search box to find the liquidity pool you just created.

Open the newly created position and verify:
- the transaction status;
- the token addresses;
- the pair;
- the liquidity amount;
- the initial price;
- the selected range;
- the position owner.
Save the official pool or market link shown by the current interface. Publish the exact contract and pool information through the project’s verified website and social channels.
A small test swap can be used to verify that the route works as expected, but it should not be presented as a mandatory condition for creating the pool or guaranteeing chart visibility.
Step 10: Prepare Launch and Post-Launch Operations
Pool creation is the start of market operations, not the end of the process.
Before publishing the launch, confirm that the project has:
- official contract and pool links;
- an owner for liquidity management;
- monitoring and incident-response procedures;
- market making coordination where required;
- launch marketing materials and announcements;
- a post-launch marketing plan;
- coordination with the project’s main CEX markets where relevant.
Continue monitoring liquidity, price impact, routing, trading activity, and price alignment after the pool becomes active.
DEX Aggregators such as DEX Screener or GeckoTerminal will pull up your trading pair after 5-15 minutes. However, if the trading volume of the pair exceeds $10,000, the data may be pulled up more quickly.
What to Check if the Pool or Token Is Not Visible
1. Verify the transaction
Open the transaction in the relevant block explorer and confirm that it succeeded.
2. Check the network
Confirm that the wallet, token contract, liquidity position, and Uniswap interface are all using the same network.
3. Check both contract addresses
Compare the token addresses shown in the transaction, liquidity position, and official project materials.
4. Confirm that liquidity was added
Open the Liquidity Positions page and verify that the position contains the intended token amounts and is owned by the expected wallet.
5. Review the pool price and range
Confirm that the initial price and selected range match the intended market. A custom-range position may already be out of range or single-sided.
6. Separate pool existence from chart visibility
A confirmed pool can exist onchain even when the interface does not yet display complete pricing or chart information.
7. Verify external tracker requirements separately
DEX trackers and aggregators use their own indexing, liquidity, volume, metadata, and filtering rules. Do not promise a fixed publication time.
8. Contact official support correctly
If the confirmed position cannot be managed through the Uniswap interface, use the official Uniswap Help Center or support email and include the transaction hash, network, wallet address, and token contracts.
Post-Launch Checklist
- Publish verified market information. Publish the official token contract, network, pair, pool link, and relevant liquidity-position information through the project’s verified channels.
- Disclose contract and liquidity controls. Explain privileged contract functions, liquidity ownership, multisig arrangements, and who can adjust or withdraw the position.
- Maintain the market. Monitor liquidity concentration, price impact, routing, and alignment with other venues. Coordinate market making where ongoing market management is required.
- Continue marketing after launch. Use launch marketing to publish the correct market information and continue with post-launch marketing after trading begins.
Uniswap Launch Execution From Listing.Help
Listing.Help helps projects turn the technical pool-creation process into a coordinated market launch.
We can support pool planning, liquidity allocation, market making, token visibility, launch marketing, post-launch marketing, and ongoing market operations based on the project’s current stage.
Uniswap does not always need to be the project’s first or primary trading venue. Where the main liquidity is concentrated on centralized exchanges, we help structure the Uniswap pool as a complementary onchain market and coordinate it with the wider exchange strategy. Projects planning a centralized exchange launch can also use our CEX listing services.
Projects can contact us before the contract, audit, tokenomics, or liquidity plan is complete. We will identify the remaining work and help organize it in the correct order.
Conclusion
Creating a Uniswap liquidity pool is permissionless, but a properly coordinated token launch involves more than completing an onchain transaction.
The team must select an appropriate market structure, verify the initial price and liquidity, publish the correct pool information, and continue managing the market after trading begins.
Uniswap can serve as an important onchain venue, but its role should be planned around the project’s wider CEX and DEX strategy rather than treated as an automatic replacement for centralized exchange liquidity.
Listing.Help can review the project at its current stage and coordinate the remaining work from pool planning through launch and post-launch operations.
 April 25, 2026